 |
|||||||
 |
 |
 |
 |
 |
 |
 |
 |
Fitting to the Space
One thing remains before turning our new design into a reality.
No matter how well-done, no drawing or scale model can adequately portray is the look and feel of a design in its new environment. The details of shape, scale and placement, as well as relationship to other items is the room, don't become evident even in a scale model mockup. As often as not, the finished product turns out to be a bit of a surprise.

|
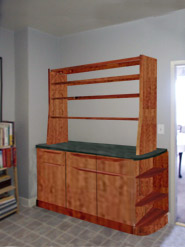
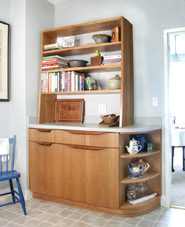
on a photograph |
Placing the new design in the room or rooms it is intended for, without actually building it, is the best way to discover problems of size, appearance and utility that would otherwise go totally unnoticed---until the project was all done, and one's sanity was lost.
Without building it? Well, the object is to produce the look and feel of the design in full size. We will build the piece, but we'll use cardboard and duct tape. Or sticks, wire frames and bedsheets. Or whatever works. It doesn't need to actually function, or even hold together for more than a few minutes; at its most basic level it could be your partner holding up a frame or panel for you to look at. (Take turns, though, if you both want to see how it looks!)
If it is a table we're considering, for example, cut out a piece of cardboard or old plywood the size and shape of the top, and support it with milk cartons. Take the measurements from the drawings to make sure the sizes and locations are accurate, and then position it where you want it in the room. This gives you the chance to pull chairs up to the table and actually try it out.
Now you can tell what might need to be changed in the design. Is the height right so that you don't bang your knees on the table top? Is there enough room to pull chairs in and out without squeezing? Is the top big enough for the intended use? These questions can be answered by changing the design based on what you learn.
As often as not, problems with the feel or function of a piece will become instantly obvious. Now they can be rectified.
There are some situations where the design can't be mocked up or simulated very well, such as a kitchen remodel where the old cabinetry is still in place and can't yet be moved.

|
Photography can be used in these cases, at least for the visualization of the design if not its placement. If you have a camera, digital or not, take some pictures of the area you want to use. Take four or five different views, and make four or five prints of each view. Then using color marking pens--Sharpie ® brand permanent markers work well on photographic prints--draw the project in place on the print. You may not like what you see, but you can throw out that print and draw on another. The prints are cheap.
You may have a digital painting or image-editing program as well that you can use to do the same thing on the computer. You can scan or open the image and play with Paint or another editing program and here you don't burn up film.
That's it: the hard work is over. Changes to the design at this point are usually minor, if any. Sometimes the changes can be made directly on the flimsy model, so you can immediate confirm that your idea is right.
Once it is, build it.
Back to the Top
© Copyright 2002-2011